


Yoda Headband Tutorial DIY
 You may not know this about me, but I have a lot of nieces and nephews that aren’t blood related. Making gifts for them is one of my favorite things, like ever!
Recently, I attending Lily’s 3rd Birthday party. It was full-on Princess everything themed.
Everything from Ariel to Cinderella to Rapunzel to Aurora and Snow White was represented. And, of course, I roll in with a completely off-the-wall gift for the little princess herself.
In talks with her mother, my good friend of over 10 years – Lisa, I discovered that outside of Lily’s current fascination with princesses, she was also becoming a huge fan of Star Wars, especially Yoda.
So, the challenge was set…What could I make this little girl that would be something special, unique, and something she’d totally love?
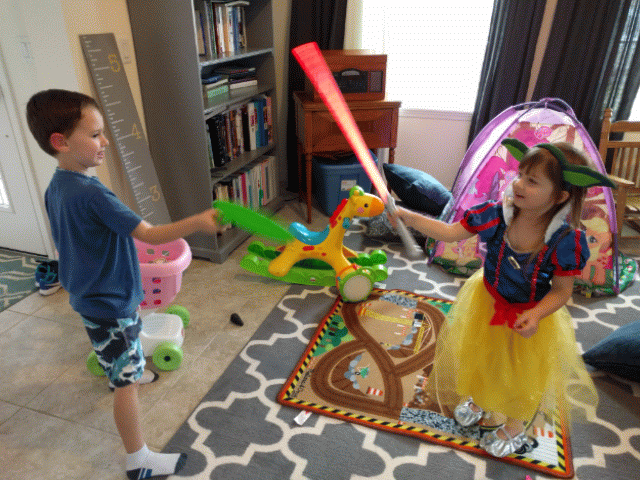
Well, I made Lily her very own set of Yoda ears! I accompanied them with a small party-favor light saber.
Love them? Well, they’re SUPER easy to make…
The Materials
Looking around the house, I found everything I needed without having to run to the store…
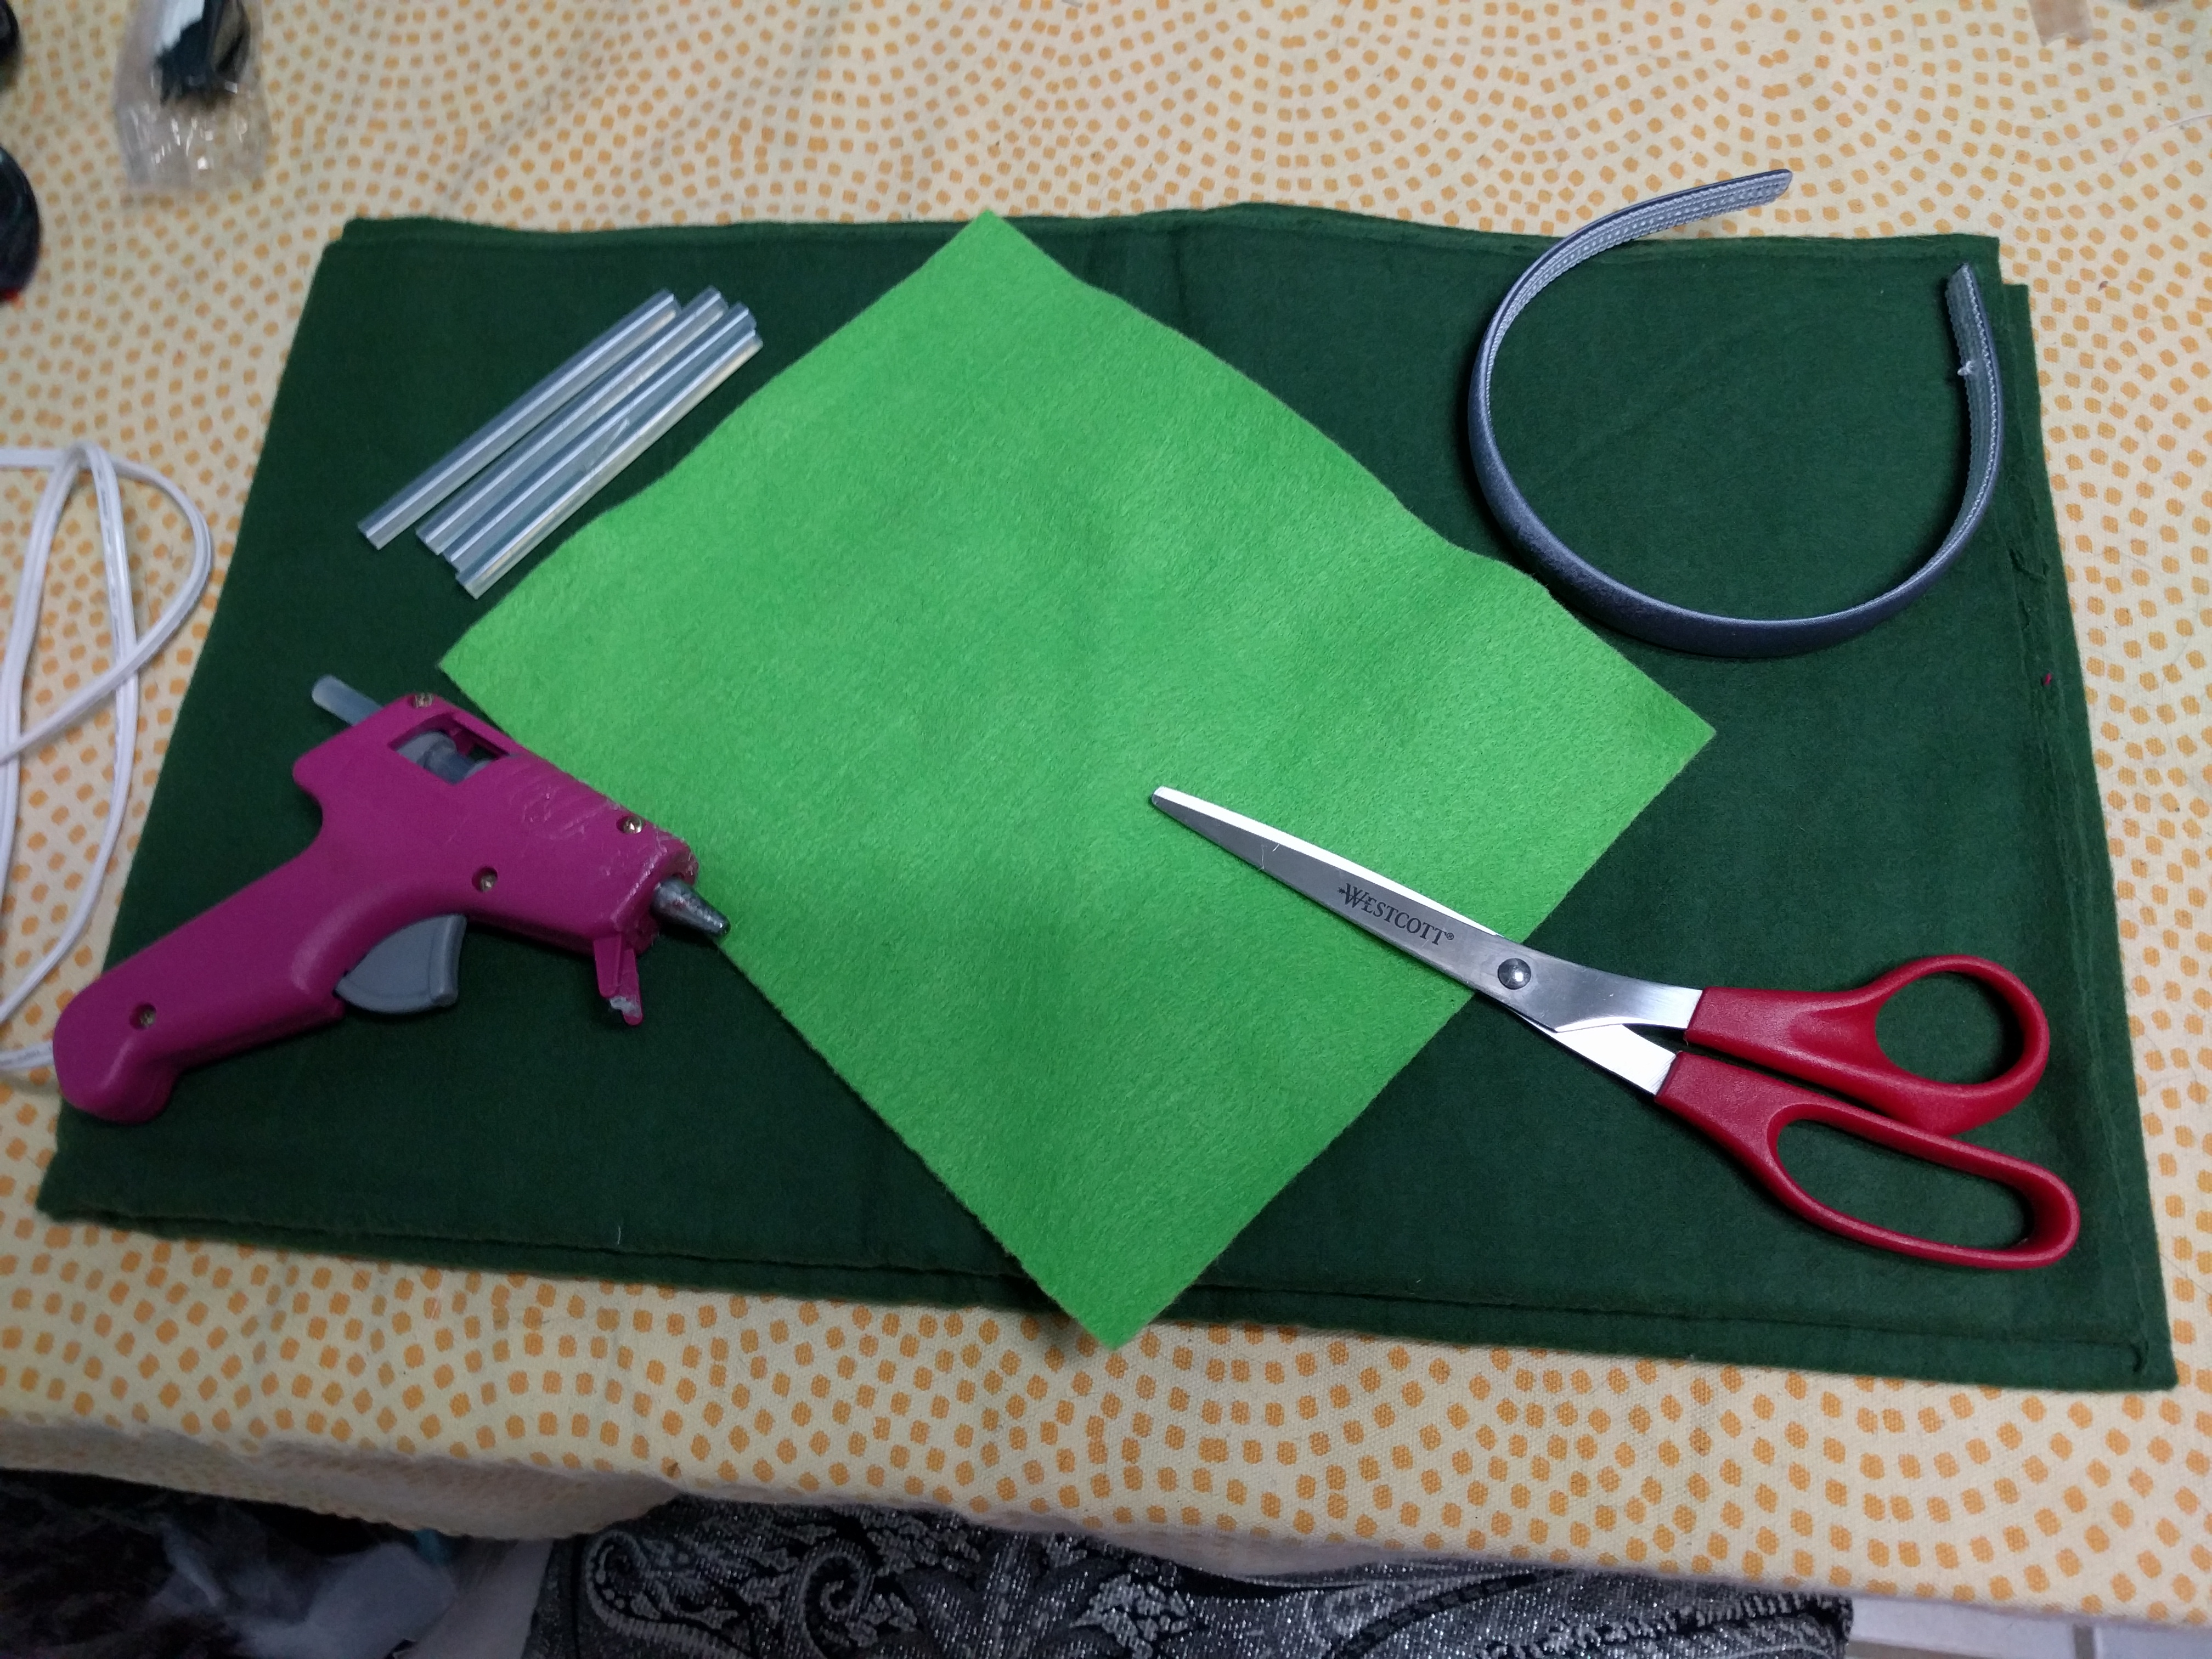 Dark green material
Bright green felt
Hot glue
Hot glue gun
Headband
Poly-fill for fluff
Sewing Machine or Needle for hand-stitching
Construction Process
I started by drawing out the main shape of the Yoda ears on paper. I cut out 4 of them from the dark green fabric. This gave me a front and back for each ear.
-

- The Template
-

- 4 layers to cut out from
Next, I went to the sewing machine and laid stitches along the outer edge on both so that I could turn them both right side out to stuff with the poly-fill. I consider not doing this and just gluing the pieces together, but I wanted them to have more structure.
-

- Seams in place before turning them out
-

- I used a little more poly-fill than pictured
I used the dark green ears to decide the size and shape of the “interior” of the ear in bright green felt. After cutting these out, I moved on to the headband. I cut out strips of the dark green fabric to wrap around the headband. Surprisingly, it took more length that I originally thought.
-

- Dark and bright compared
-

- Outline for bright green
-

- All cut out
-

- On top of each other
-

- strips cut out and read for the headband
-

- The headband before attaching the ears
I had to think about it before getting started when it came to attaching the ears to the headband. One big issue I had to think about was placement. Yoda’s ears seem to come out straight from the sides…and my head is bigger than a 3 yr old’s…so I had to kind of guess at it.
So, I opened up the ends of the ear, laying the overlaps over and under the head band. I laid a bit of hotglue for the top of the headband to kind of stick to the fluff inside the ear. Added a bit more hot glue and wrapped the back side of the overlap across, then did the same with the front flap (making the front look better than the back).
-

- The ear in position over headband
-

- Back flap glued, now for the front one to come down, too
The Finished Product
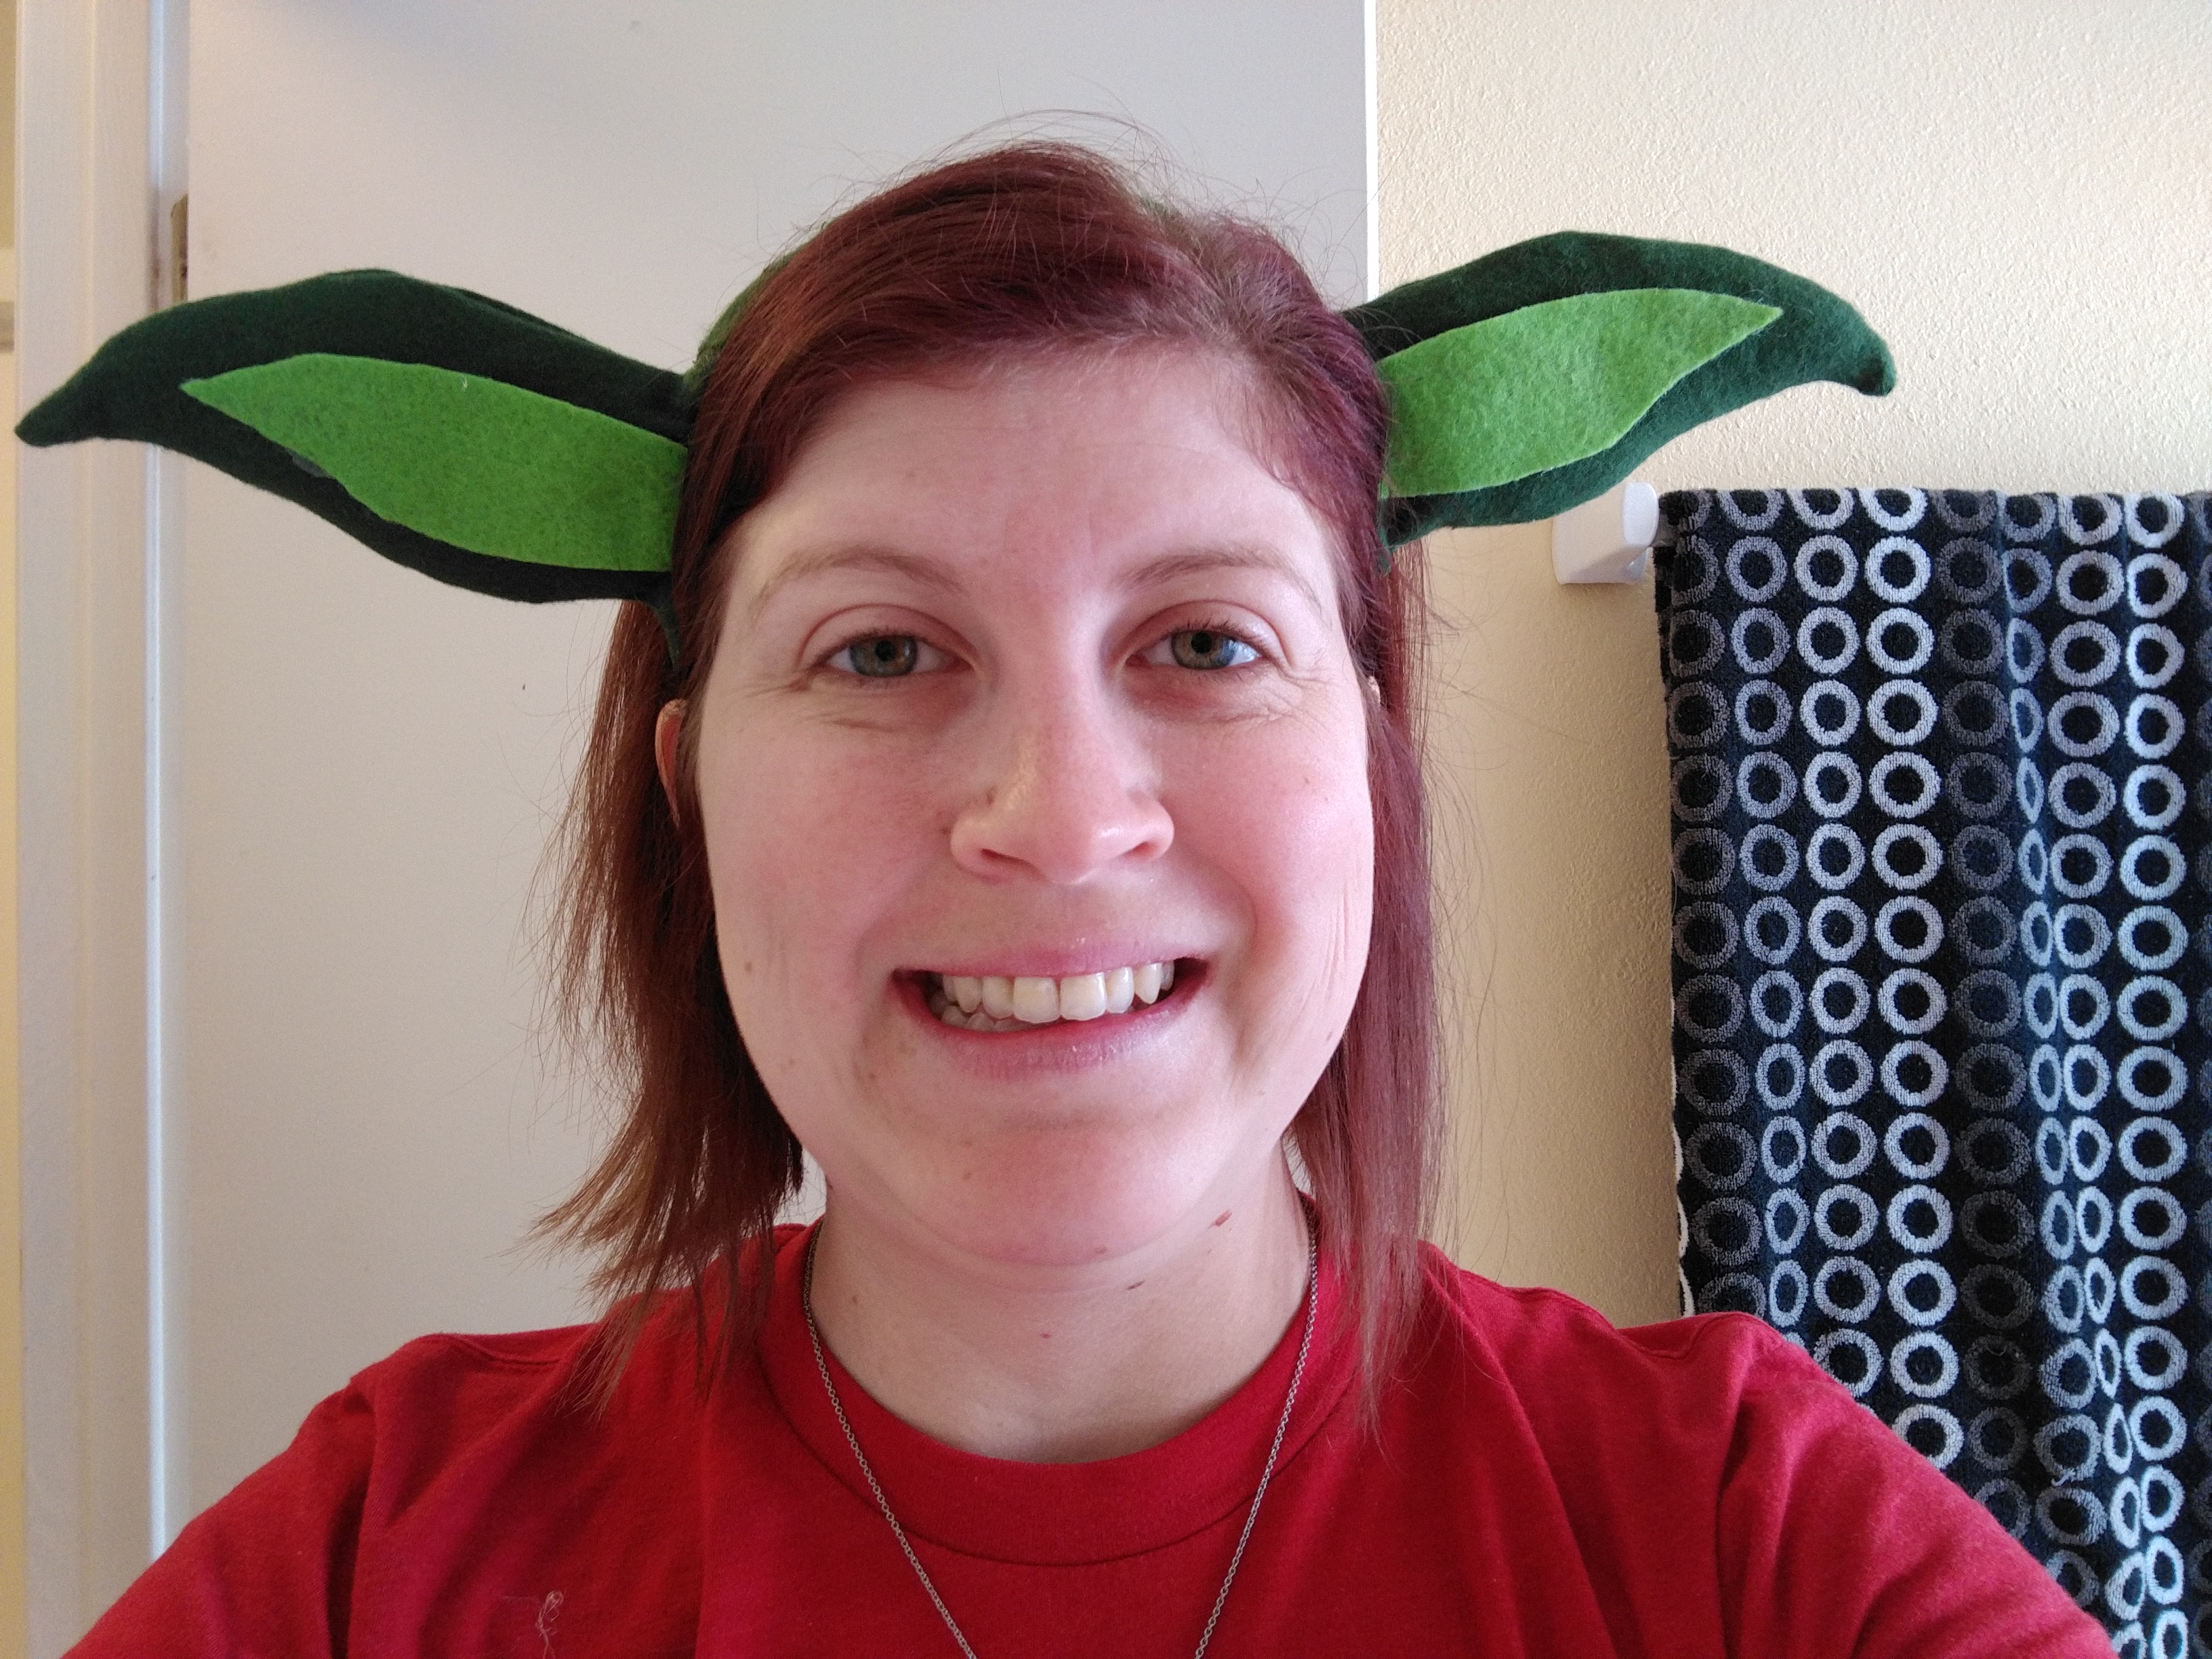 And ta-da you have a set of Yoda Ears that totally rock.
Of course you want to give yourself a test fitting before you wrap them up to give away.
I was quite pleased with them.
They’re not super refined or super accurate, but you have to remember the imagination of a child can make something awesome out of anything.
Making these for Lily allowed me to give her something special for her 3rd birthday that she’ll remember and my band account won’t.
-

- If you’re wondering what she’s doing…She’s singing the Star Wars theme song!
-

- I had too much fun with her dark side and that red light saber